Wednesday, January 26, 2011

How to Give your Photograph an Antique Look?

Let us start off with a normal full-color photograph


Select the photo layer, go to Filter > Noise > Dust and Scratches. Set the Radius to 2 and Threshold 0.

Duplicate the photo layer. Select duplicated photo layer, go to Filter > Blur > Gaussian Blur. Set Radius to 4.


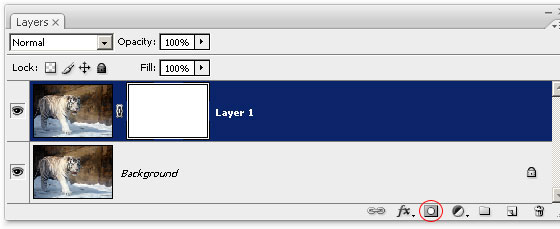
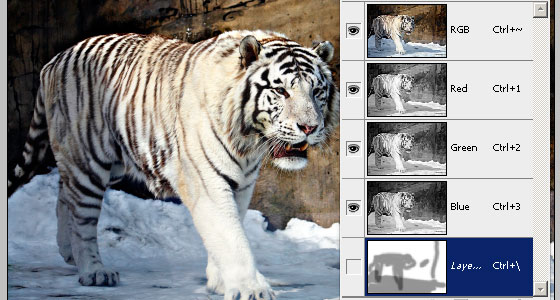
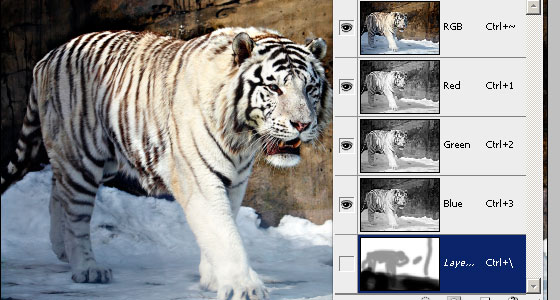
Make a Layer Mask on the duplicated layer. On the mask, create a Radial Gradient as shown in the screenshot below.

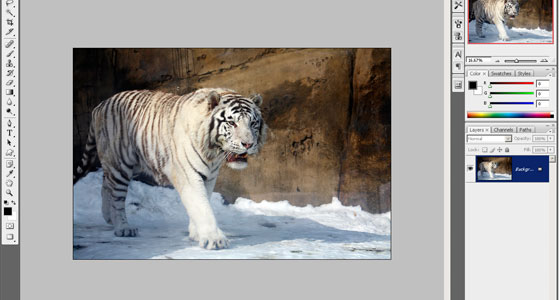
Download "Vintage Background" from ShutterStock. Resize it to cover the photograph nicely. Go to Image > Adjustments > Desaturate.


Set the Blend Mode of vintage background to Soft Light.


Download "Grunge Background" from ShutterStock. Resize it to cover the photograph nicely. Go to Image > Adjustments > Desaturate.


Set the Blend Mode of grunge background to Multiply. Go to Image > Adjustments > Brightness and Contrast. Set the Brightness to 50.

Create a Hue/Saturation Adjustment Layer. Check on Colorize. Set the Hue to 38, Saturation to 22 and Lightness to 0. And that is all! I have you find this tutorial useful for your future works. Cheers.


Download FREE People Silhouettes (Huge Set)


FREE Download The Best And Most Expensive Fonts

or

Changing Hair/Eye Color in Photoshop

Tuesday, January 25, 2011

Local Contrast Photoshop Tutorial


Step 1: Open an image

Open a photo into Photoshop. To open a file, choose File > Open, browse for the image file, and click OK.

Step 2: Duplicate the layer and add a layer mask


Press Ctrl+J or choose Layer > Duplicate. This will create a second copy of the background layer. On the new layer, click on the add layer mask button in the Layers palette to add a layer mask.

Step 3: Use the Unsharp Mask filter

When we added the layer mask, it automatically selected the layer mask. Select back the layer by clicking on the thumbnail of the layer. Now choose Filter > Sharpen > Unsharp Mask.
In the Unsharp Mask tool, set the Amount to 100% and increase the radius until the details become more apparent. Don't worry about it looking too sharpened - we'll work on that later. Adjust the amount so that the image contrast looks strong, but not posterized. Click OK when done.

Step 4: Paint the layer mask


Most likely, you don't want this effect to appear on the entire image, but rather just certain areas. In this step, we'll paint the layer mask to specify where and how strong the local contrast effect will be applied.
There are two ways to do it:
  • Remove the effect from certain areas
    Use the Eraser tool to erase certain areas of the layer mask.
  • Add the effect to certain areas
    Select the layer mask and press Ctrl+I to invert. This will make the layer mask black. Use the Brush tool to paint the areas that you want to apply the local contrast effect to.
For this tutorial, we'll use the Eraser tool. Select the Eraser tool and set the hardness to 0% and opacity to 50%. If you're the Brush tool instead, use the same hardness and opacity.


Make sure that you have the layer mask selected. Click on the layer mask thumbnail in the Layers palette to activate it. With the layer mask selected, erase the areas that appears to be too strong. If you're using a brush, paint the areas where you want to increase the contrast. In the image below, I erased the ground. tiger, and parts of the background slightly. My layer mask may look like I did a sloppy job, but that is fine because it is hardly noticeable in the final results.


Now set the opacity to 100% and erase (or paint if you're using the Brush tool) the areas that you want to fully remove the effect from. For example, the snow on the ground looks dirty with the effect, so I masked out the effect from the snow.

Final Results

Here is the before and after effect of this Local Contrast Photoshop tutorial. After applying local contrast, the wall in the background shows a lot more detail. This effect can make photos look as if they were taken with high quality lens.

How to set up a business card